Click on the button below to access a huge number of additional resources through Microsoft SharePoint. Please note, you will need to be signed in to your school account.

Below are some websites and links you can use to do some extra learning or revision.
You can also email your Geography teacher:
Mrs Fielden – sfielden@bluecoat.uk.com
Miss Collins – scollins1@bluecoat.uk.com
Mr Hurst – mhurst@bluecoat.uk.com
Key Stage 3
Map skills: Mapzone | Ordnance Survey
Coolgeography.co.uk – select your year group tab at the top and then choose the topic.
Key Stage 4
Map skills: Mapzone | Ordnance Survey
Coolgeography.co.uk – select your year group tab at the top and then choose the topic.
GCSE Geography Revision Techniques
Techniques to help you revise GCSE Geography
Before you start revising it’s useful to know what you need to cover. Your teacher should be able to help you with this!
The GeoTopics area of the site contains most of the topics you need to revise so you can use these along with your class notes to revise from. To get started you should choose a method of revision that suits you. Take a look at the techniques below. There is a range of revision techniques you can use to revisit what you have studied in class. Here are a few examples:
Technique 1 – Revision Cards
1. Make notes on an area of study. This could involve highlighting information in a revision book or writing information out. Effective students avoid copying huge chunks of text. They read the information – then summarise it.
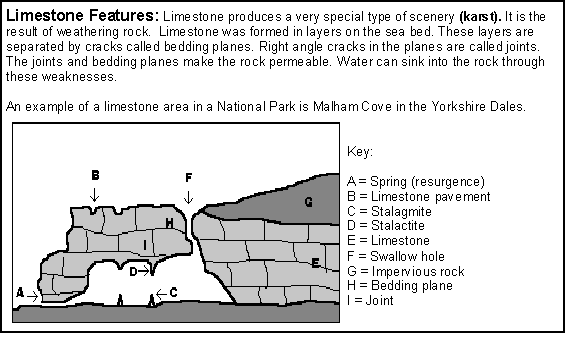
2. Once you have gathered notes summarise your notes on revision cards – blank postcards or post-it notes are good for this. You can then stick them all around your bedroom, toilet, bathroom etc! Below is an example of a revision card.
3. Read your cards through regularly. Once you’re confident about knowing the information write keywords about the topic on a card. Then revise from these. As your knowledge base builds up you will need fewer prompts to remember information. BRAIN SCIENCE ALERT: By displaying this information and regularly reading it you will create stronger connections between the neurons in your brain which will help you retain information.
Technique 2 – Mind Maps
A mind map is a spider diagram that contains information in the form of pictures and text. Mind maps can be used to plot information relevant to the different topics in geography.
When you create a mind map you should use lots of colour and include diagrams and sketches. This makes the information more interesting to your brain. It should also make revision more ‘enjoyable’. Below is a tutorial explaining how to create mind maps.
Stage 1
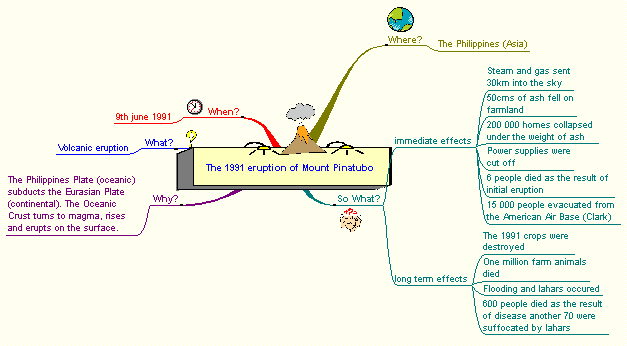
In the centre of a piece of A4 paper identify the topic you are producing your mind map about. The example below is a case study of the eruption of Mount Pinatubo, a volcano in the Philippines.
Stage 2
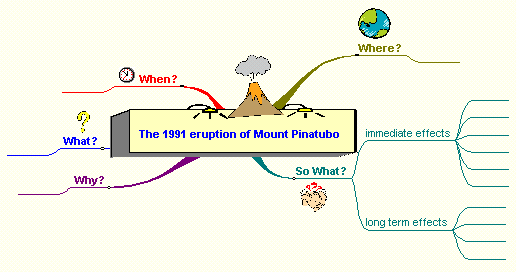
You now need to draw the main topic branches. These need to contain the main categories of information that will be included in your spider diagram. In the mind map below we are going to use the What? When? Why? Where? So What? technique.
Stage 3
Finally you need to include the subcategories or detail to your mind map. The diagram below shows a completed mind map for the eruption of Mount Pinatubo.
Technique 3 – Asking questions when taking notes
This technique involves asking questions when making notes. The example below considers the main features of earthquakes.
What
When
Why
Where
Who
So what?
Earthquakes
Question cues you can use are what?, when?, why?, where?, who? and how? There are more – can you think of any?
Technique 4 – Change the form of information
Your textbooks contain a lot of information. Some people can read this information and remember it! If you find it hard to retain information that you read then do something with it. For example, take a piece of text and transform it into a diagram.
Technique 5 – Teach It!
Another useful method of learning information is to try and teach someone else what you have learnt.
A good method to use is to write down the key points of what has been learnt
over a set period e.g. 3 lessons and try to teach the other person, who questions everything he or she cannot clearly understand.
Try also setting a test on what you have taught. The other person’s answers will
clarify your own thinking!
Technique 6 – What would you tell your brother?
Simplify some text about the topic you are revising and write down what you would tell someone younger than you.
Technique 7 – Condense it – 1
Read a paragraph of text and condense it into one sentence.
Technique 8 – Condense it – 2
Read a paragraph of text and identify the six most important words. Highlight them.
Technique 9 – Condense it with a friend
Complete technique 5 and/or 6 with a friend. Compare your answers and discuss your choices.
Technique 10 – Sequencing
Photocopy a paragraph of text. Cut up the sentences. Mix them up then attempt to arrange them in order.
Technique 11 – Podcasting
Use software like Audacity or Garageband to create an MP3 you can upload to your phone. Then, revise on the move.
Technique 12 – Testing Times
Get a friend or member of your family to ask you questions.
Technique 13 – Ram Bam (Read a minute – Bullet a minute)
Reading through notes without a purpose is DULL and ineffective. Set yourself a target of SCANNING (not close reading) a page or two in a minute. Close the book and then write in a minute (or a bit more) ALL that you can REMEMBER.
Technique 14 – Summary Sheets / Index Cards
At the end of each lesson, write a summary sheet of the lesson identifying the key points and examples. From this then write index cards, which just consist of the key points. A few days later, review the index card and on a blank piece of paper write down the examples or principles the key points trigger in your memory. Compare this to your summary sheet or lesson notes.
Order your index cards into subject groups and then prioritise. Before another lecture on the same subject, review your index cards to refresh what you have learnt. This reviewing helps aid your long term memory.
Technique 15 – BLANK SHEET
Choose a revision area and write for as long as you can on a blank sheet. You’ll be amazed by what you remember. And it’s a revision task that makes you think. Do it in the exam room too, before you open the paper, and see how much actually turns up in the exam questions.
Technique 16 – CONCEPT MAPS
Concept maps involve taking the main features of a topic and listing them.
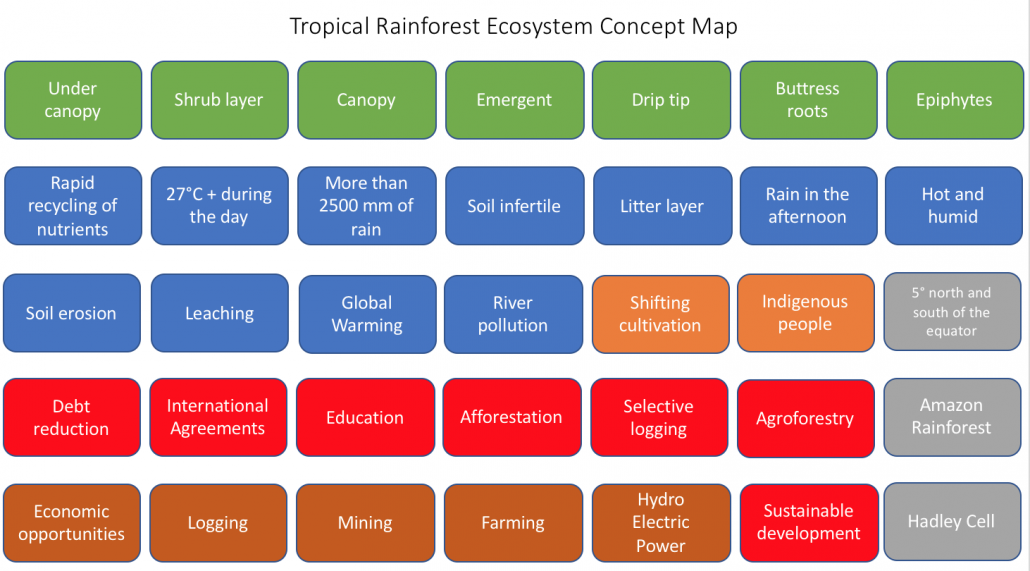
Tropical rainforest concept map keywords
Next, you identify the links between the different features.
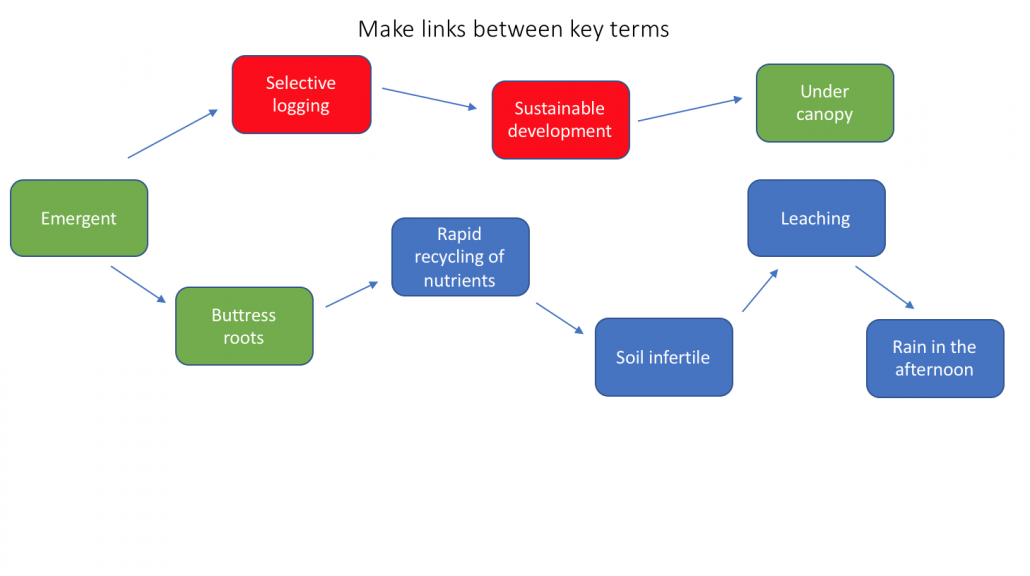
Tropical rainforest concept map links
Finally, you should explain the links between each.
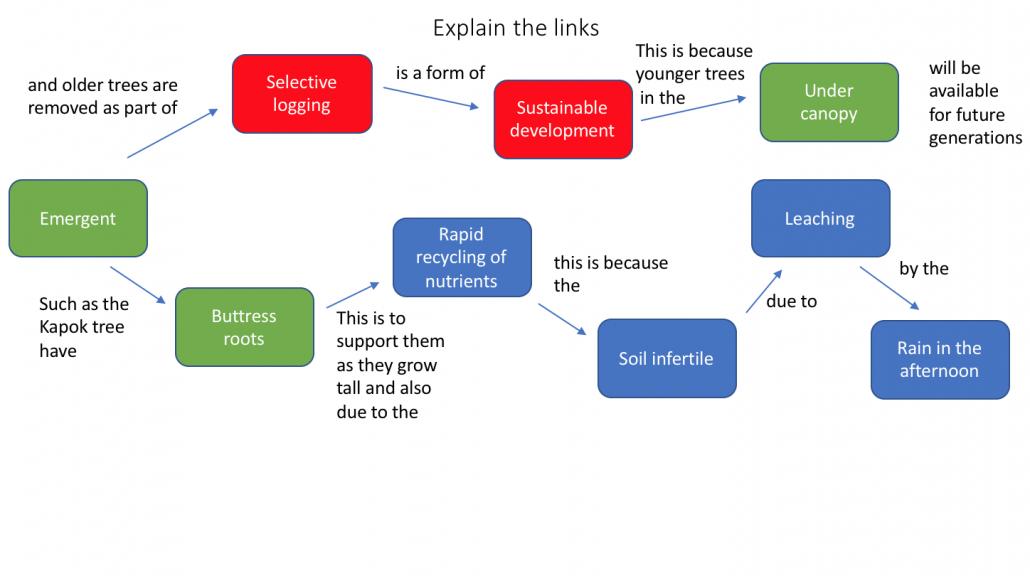
Tropical rainforest concept map links explained
Below are three examples of concept map activities you can download and use.
Rainforest Ecosystem Concept Map
Technique 17 – Retrieval Practice
Create your own quizzes based on topics. Create them, test yourself or get someone to test you, it works!
Technique 18 – Graphic Organisers
Transform the information into visual revision to create links, identify causes, impacts and response and evaluate their importance.


